Sunday, August 23, 2015

Deja Vu

 Ok Guys, today I have something completely new and something you have never seen before!  Oh wait...yeah, I remade a pattern with the same exact fabric as last time.
 
 Ok, so my pink sweater is not only super dingy now, it also has a giant rip on the boob part for some reason.  I had plans to wear the exact same sweater for the pictures, but nope, there is a giant hole in it...and it was my favorite sweater.  But, now I wont feel bad when I cut it apart and to make a pattern out of it. 

Okay, so I went to school for photography and I really toyed with self portraits for my art.  Now, the blog pictures are usually done by my husband.  I love my husband so much, but he is very detail oriented.  So, when I ask him to take pictures of the back of my makes, it takes FOREVER!  He tries to get me to do poses and things like that.  I get so irritated...I mean seriously, I just need a quick picture of the back.  So, today I was extra...ummmm...impatient and I obnoxiously was telling him how it needs to be quick-quick and he snapped a couple perfectly fine pictures, but I chose the one where I am obnoxiously snapping at him lol!  Plus it looks like I am dancing!
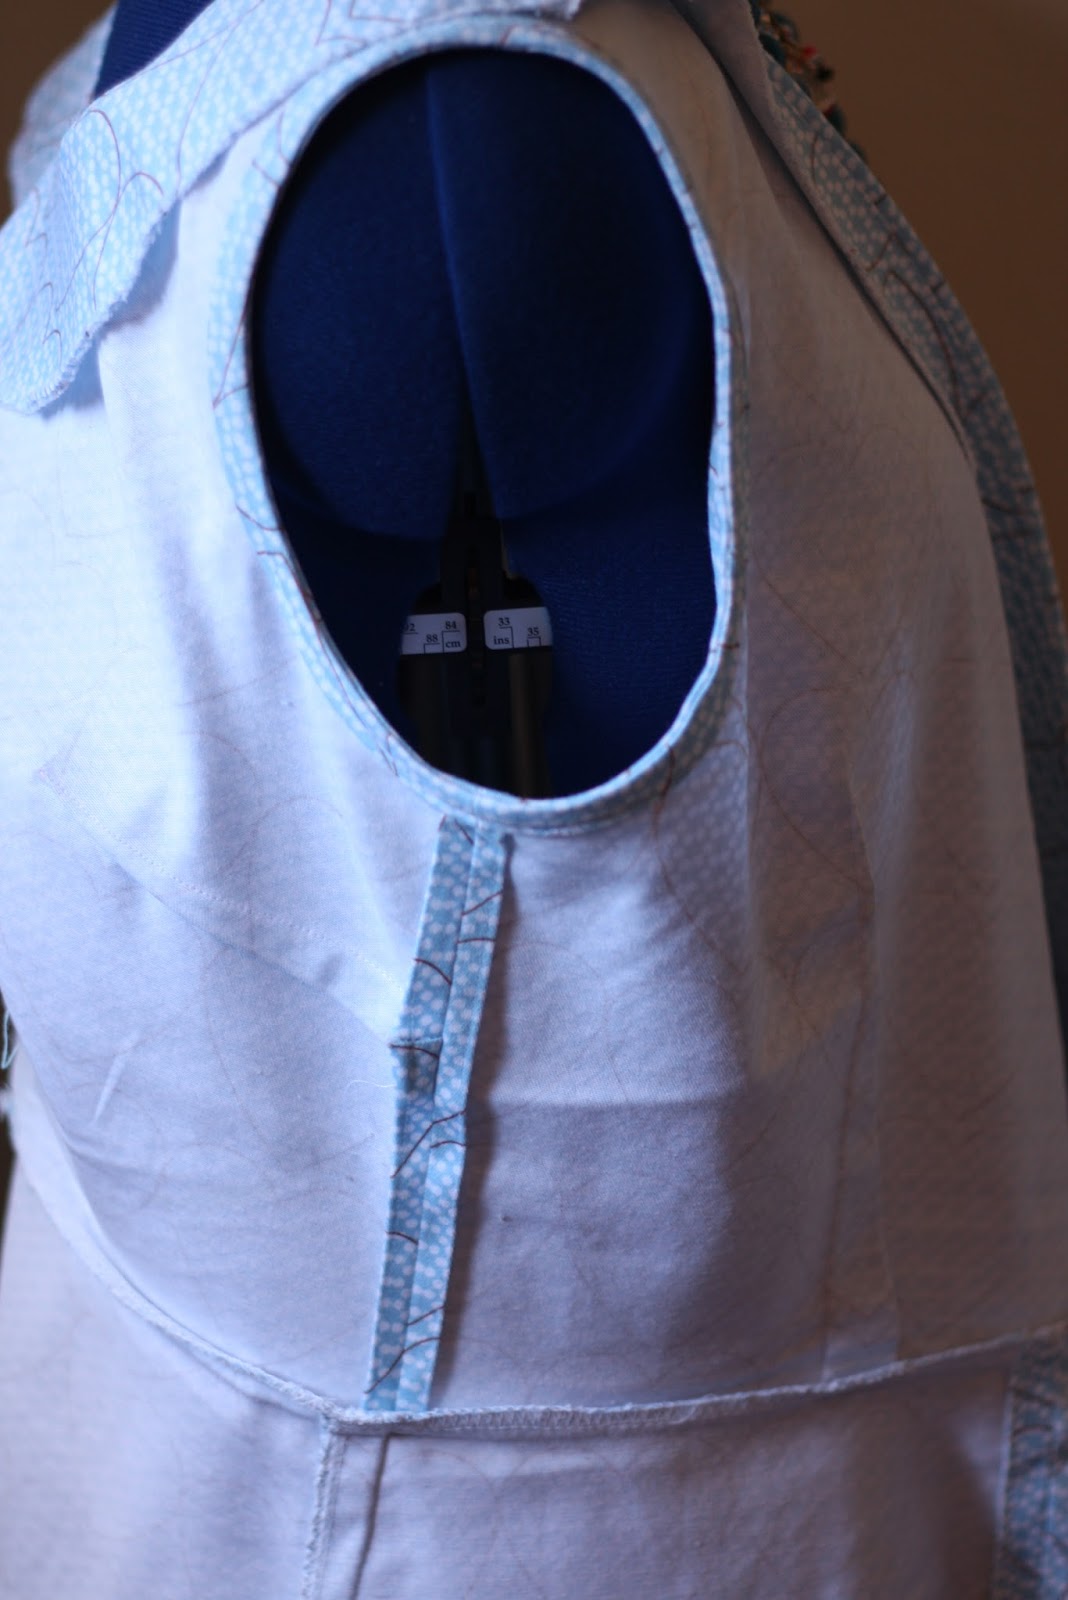
So, this dress is made differently than the first one.  For starters, look at the print matching on the front skirt and I made sure to center the hearts on the front bodice.  I ended up having very little fabric left to match the side seams, but that's okay...the front looks nice.  I also didn't seam every single seam like last time.  The shoulder seams and side bodice seams are finished with turned under finis  I serged the skirt seams and the edges of the facings.  I also discovered a great way to finish off the waistline. I opened out the facing and pinned the skirt on and folded the facing back over.  So, basically you have the skirt sandwiched between the facing and bodice piece.  I didn't know if it would work out so I didn't take pictures of it.  I do plan on making it again, so I will have to take a picture of what the heck I mean lol. 


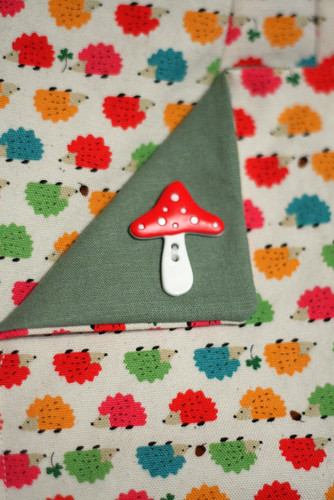
 The other change I made was eliminating the cap sleeves.  Honestly, my other dress had these minimal little cap sleeves after all of my fitting there wasn't any left.  I always wear cardigans (as you can tell by my farmer's tan!) and when I wore cardigans with my last dress, it almost looked like I was wearing shoulder pads.  So, this time, I just used my french curve to trim that section off.  I like the way it sits on my shoulders much better this time.  Instead of drafting new facings for the armholes, I decided just to finish off the armholes with bias tape!  I made it myself (obviously) and I HATE ironing bias tape, so it is more like a Hong Kong Finish instead of a true bias tape finish, but it is pretty similar.

One thing I did NOT change was the dart placement.  So, I had said I wanted to shorten the darts by an inch and for some insane reason, I thought I had already done that on the pattern, but nope.  Oh well, next time I really will have to do that.  I also need to shorten the pattern by 2 inches because I didn't do that and it was a little stressful trying to fit everything on my fabric. 
So, another thing I did differently was I actually understitched my facings.  So, without the topstitching, the neckline doesn't pucker and it actually sits nice.  Side note: I actually wore this dress to a family reunion yesterday and I got a pretty bad sunburn!  This is WITH sunblock.  My face and legs didn't burn for some reason, but yeah, that's why I am like a tomato and my dress is wrinkly!


So, why did I make an exact copy of a dress?  Well, it was because I knew I would learn a lot by doing it and I did it purely for science reasons.   I didn't accidentally put a red lipstick in my pocket and then wash and dry my dress.  What?  I would never.  

........


But, seriously, it looked like I murdered someone.  I tried saving it and it didn't work so I tossed it.  When my husband came home that night, I told him about the tragedy and he was actually upset.  So, anyone who has made this dress in fabric that wrinkles will agree with me when I say that this dress is a BEAST to iron!  And anyone in my family can tell you how much I HATE ironing and also I am pretty bad at it.  So, my husband offered to iron my dress for me every time I washed it ( I know, he is amazing and no, I can't loan him out) and he spent A LOT of time with my older dress.  He looked like he lost a member of the family.  I told him I could make it again in leopard print, I have some in my stash, but no...he wanted it in the same fabric.  Unfortunately the fabric store where I bought it from ran out long ago.  So, I was browsing Denver Fabrics, and I found it!  So, I bought 3 yards of it (and some sweater knit) and when it came in, I showed him and I have NEVER seen him so happy about a fabric purchase!  So, when the family reunion invite came, I knew I would have to remake this dress for that occasion.  He was pretty happy about the dress being done and I love to wear it because I know it makes him happy.

Except that when it came to picture taking, he wanted everything to be perfect and it took forever....I love how I sing his praises and then complain.

I love you Devin!  I made this dress just for you!  Thank you for ironing my clothes, taking my pictures, and putting up with my impatience! 

Wednesday, August 12, 2015

Still Alive!!

That's right, I am still alive!  I have not been sewing much due to life events, but I couldn't take it anymore and I busted out my credit card and bought some new fabric and a new sewing pattern, just in time for my 7 year old to go back to school! 

As soon as she spotted this fabric on my instagram feed, she told me that was what she wanted for her back to school dress. 

I argued with her and the collar fabric, I thought it would look best with a bright pink for the collar, but she was insistent on using the dark purple.  I only agreed because I thought I would be proven right later when I put everything together....except that I was proven wrong and the purple goes really well with the fabric.  We then had this conversation:

Me: Well, munchkin, I think you were right about the purple fabric, it looks really good with the cat fabric.

Kayleigh: Well, you should use this as a lesson.

Me: A lesson for what?

Kayleigh: I just hope that you learned to listen to me when it comes to fashion.  I AM a fashionista.

lol!  Well, lesson learned. 


The pattern I used was the Violette Field Threads Ginger Dress.  I have actually used their chloe pattern before, and I only really got one good picture of it so it is unblogged and will remain so because it no longer fits her lol.  That was a good pattern too, though (FYI).  I really love this pattern company.  I always get good results from them and I enjoy the process. 

I do have some...problems with the pattern, both are probably user error, though.  So, both problems revolve around the straps.  The seam allowance in this pattern is 1/2" and they have you place the straps 3/4" away from the side of the bodice.  So, when you sew in the lining, you will only have 1/4"  left on the upper edge of the bodice.  However, I have 3/8" on the upper edge and it bothers me.  That extra 1/8 of an inch makes it look like a mistake.  The second problem I have is that the straps don't sit well.  The sit best when tied around the neck as a halter neck, but I was going to do the criss cross back, but when I did that, the straps were all bunchy and REALLY didn't sit well. I think next time I will figure out what's going on there and probably even make the straps shorter. 

All-in-all, I do love this pattern, it was so easy to put together and I think it made a really cute dress.  Obviously, my little one loves it. 

I don't know how many more times she is going to make an appearance on my blog, because she is getting to the point where she doesn't want her picture taken any more.  :(  But, I do have plans to sew up the Haven Dress in a super cute unicorn fabric for her before she goes to school.  Next is the Colette Patterns Crepe Dress again, though.  I don't like to buy clothes, so since I haven't been sewing, I have been wearing out my clothes and not replenishing them!  I don't have any clothes and I need to start sewing more!!  Plus, I've convinced my sweetie to take me to L.A. for fabric shopping once I have cut my stash down a bit.

Thursday, December 4, 2014

Pattern Review Sewing Bee!!

Hey guys!  I know, it's a long time no see, right?  Well, to be 100% honest, I haven't been sewing much.  I have had a really rough year.  I always have a problem with over sharing details of my life, so I am not sure what I can and cannot say about it.  Of course, I am making sounds a thousand times worse than it really is.  Suffice it to say that 2014 and 2013 have been incredibly draining years for me emotionally.  I felt like I had lost myself.  So, in October, while I was sewing my daughter's Halloween costume, I found out about Pattern Review's Sewing Bee.  I thought it might get me out of my funk so I joined the challenge, hoping I would make it to Round 2.  Well, I did!  Then I made it to Round 3!  Unfortunately I didn't make it past Round 3 and was eliminated.  I was disappointed, but the contest was so much fun and helped me move past my emotional funk that I was stuck in.  I also discovered my passion in life, which was totally unexpected!  I realized that I was passionate about CREATING THINGS.  I told my husband about my epiphany and he rolled his eyes and said, "obviously". LOL!  Sometimes it's hard to see what's in front of you sometimes.

Anyways, I am sure you guys are waiting for the pictures of everything I did.  So, full disclosure, I am not going to go into 100% of what I did, because it is all in my reviews on Pattern Review, it seems superfluous to go into that kind of detail again.  So, I will link to my reviews.

Challenge 1: A-Line Skirt
HEDEHOGS!!!  TOADSTOOL BUTTONS!!
A seemingly simple task.  But, wait, I don't have a lot of bottom weight fabrics and I don't really wear A-Line skirts, opting for fuller skirts.  So, I went to my new favorite fabric store in the Bay Area.  If you are ever in the area, stop by-it's amazing!  While I was at the fabric store, I found.....wait for it.....Hedgehog linen fabric (insert explosion sounds as my mind blows).  It was an amazing linen blend that doesn't wrinkle and presses like a dream.  So, if hedgehog linen doesn't get you excited then something is wrong with you then maybe you will be interested in the TOADSTOOL BUTTONS I found!  What?  I know, they're amazing.  Anyways, I used Gertie's Pencil Skirt pattern in the Gertie's New Book for Better Sewing and I made it into an A-Line Skirt.  I used Sunni's tutorial on adding pockets to your skirt.  The lining sucked...seriously.  It was put in great, but the fabric really sucked.  The pattern was wonderful (could you expect anything different from Gertie?) and the linen was amazing.  Now I just need a shirt to go with it. 


Aren't I overly enthusiastic? lol

Pattern Review

Challenge 2: Refashioning a Men's Button-up Shirt

Before
So, this one was rough for me.  I don't refashion that much.  So, this one really had me thinking about everything.  I would do a lot of this differently if I were to do it again, but I still like it...I think.  I don't know, I go back and forth on this dress to be honest.  It's a little...much for me (says the person who made a hedgehog skirt with toadstool buttons...), but I think I can get used to it.  I've worn it out and have gotten compliments soooooo.....

Okay, the cool thing about this dress is all of the detail I added! 
So, I kept the original pockets on the skirt (as you can tell by my boobage picture).  I took the pocket flaps off of one of the shirts and put them in the seams of my skirt, which I thought I was the bee's knees when I thought of that.  I kept the sleeve plackets intact (and functional), but I put it at the hem of my skirt, again I thought I was the coolest kid in the room when I thought of that!  Then what REALLY made me excited was when I decided to make a mock lapped zipper using the snap placket from the front of the shirt.  I call it mock lapped zipper because underneath that placket is an invisible zipper...it's all I had!  There is a whole step by step process on my pattern review of it.

Also, those are new shoes...and I'm obsessed with them and convinced that they go with EVERYTHING!
Pattern Review

Challenge 3: Winter Street Dress

So, for the third challenge they gave us all a pattern and told us to sew it.  I interpreted the rules as keeping the integrity of the pattern intact, fit the dress perfectly to you, and add in your own minor tweaks.  Oh, and you had to use two different knit fabrics!  I think my minor tweaks is what got me eliminated.  Seriously...check the contest gallery, insane!  I think everyone did great, but they had to eliminate people, and I fell in the category...perhaps it was because I threatened them?  I don't know lol.

Anyways, I bought this fabric while in LA last time.  I was in love with it, but I was unsure what to do with it.  So, I broke it out for this challenge.  I added an 18" flare to the skirt(!) and eliminated the pleats.  I lowered the neckline about an inch to make it more flattering (and apparently so I can add another boobage shot...seriously, I didn't do it on purpose lol!!)  Instead of adding 2 inches to the length of the bodice, I wanted to show a different way to add length and I made a pink polka dot waistband (with waist ties!).  I also added in gathering at the center, because I thought it needed a little something something.   My favorite part of the dress?  The sleeve ruching.  I did this by muslining twice (groan) and testing out different starting points and positions of the ruching.  It's crazy easy.  You grab some clear elastic, put it at your starting point on your sleeve (or whatever) which you carefully marked beforehand (right?), stitch a little, backstitch, then you pull the elastic tight (in a straight line!), and stitch a straight line-backstitching at your end point.  Not going to lie, the first time will feel awkward and you will feel like you need three hands, but once you practice a bit, it will be easy and provide really pretty results (that look like it took a lot of time lol).  Anyways, at the end, I used a tutorial for freezer paper stenciling and I put two little deer at the hem of my skirt...why?  Because I could lol!  Then, I hemmed with some lace and called it a day. 
I love how this picture makes me look like an old lady lol
Sleeve Ruching!!
Funny story about this dress.  After making it, I realized that I NEEDED more knit fabric to make this dress again and I wore it to go fabric shopping.  Now, I also needed white satin for my daughter's flower girl dress so I went into the City (which is the Bay Area's fancy way of saying, San Francisco) and I went to the Fabric Outlet (another great fabric store).  Anyways, while I was looking at the knits, a woman walks up to me and says that she loved my dress and asked if I made it.  I smiled and said yes and we exchanged pleasantries.  Then, as I moved to another section, she followed me...then she followed me to the next section and so on.  Then when I was getting my fabric cut, she followed me up there.  All this time NOT TALKING!  Lol, she was pretty awesome, but I think she wanted to talk to me, but was too socially awkward to know what to say, and I was too socially awkward to know what to say to her!  Anyways.  I have also gotten compliments from small children in my daughter's class.  So, my dress is cool according to 6 year old standards...I'll take it!


Oh what?  Some of you noticed that I said I threatened the judges?  what??  I would never...

....

Maybe I did.  Well, after years of watching The Sopranos and The Godfather movies, I knew that when you were in a sewing contest and you wanted to win, you IMPLY something bad will happen.  So, I told them that if I didn't move on, I would call in my muscle and she would tickle them until they peed their pants (her words not mine)


Pattern Review Contest Committee: She's coming for you, and she will tickle you...mercilessly. :P

Pattern Review

**Also, sorry about all the links!  I didn't want to bombard you guys with copious amount of pictures!