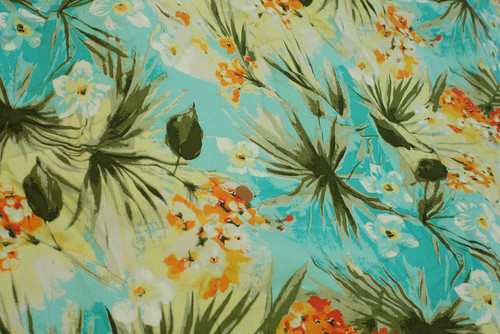
Thursday, June 20, 2013

The Beginner's Series: Fabric

So, you want to go out and buy fabric for the dress?

Ok, great.  So you walk into the fabric store and have a panic attack because of all the different kinds of fabric and you don't know which one to buy!  So, I wanted to write this post just for making this dress.  BUT!  If you are just starting to sew, one of the things I recommend to you is to go to a bunch of different fabric stores and touch all the fabric you can.  This is the only way you will be able to start differentiate between a challis and a chiffon; a damask and a jacquard; a lawn and a voile.  Or, you can do what I did, scout online sales and buy cheap fabric and work with it.  This is how I discovered my love of lawn.  I just loveses lawn. 

Anyways....

for this dress, I recommend using a cotton (especially if it's your first dress!).  It's easy to work with and easy to wear.  But, just saying cotton doesn't tell you anything.

Quilting Cotton:
*le sigh* no matter what I say, I will be saying something wrong here.  Some people are anti-quilting cotton (to use when making garments).  Other people think quilting cotton is the best thing!  My personal preference is to not use quilting cotton because 1) I can never make a professional looking garment with quilting cottons 2) I don't like how heavy it is in the summer 3) and I don't like the scratchy feel.  That being said, quilting cotton is a great place to start for beginners and those prints just pull me in!  As a warning, if you are going to use quilting cotton, I would advise against the shawl collar.  You can try it; it could work.  But, quilting cotton is pretty stiff.

Some ideas: Rainbow chevrons, records, I may have to get this fabric to match my glasses, photography dress, don't like bright prints? how about a pirate dress?, you know I love me some floral, fancy some sushi?, cherries?, or what about a nautical dress?

So, those are just random fabrics pulled up on Hart's fabric. 

Cotton Lawn:
I just love lawn.  Seriously, I could make me entire wardrobe out of it and be happy...cold during the winter, but happy. Next year for my birthday, I am going to get 3 yards of liberty.  I think this dress would look beautiful in this lawn, no?  Hmmmm....did you hear that?  Oh that's just my husband having a heart attack upon seeing the price tag of that one!  It is beautiful, but $47 a yard is a bit much.

So, cotton lawn provides a lot of prints, but is lightweight and breathable for the summers here on the northern hemisphere.  The only catch with lawn, is that you need to make sure that it is not see through!  If you buy it, bring it home and then realize that it's see through, don't panic.  Hop online, buy some batiste and underline it.  Don't know how to underline?  Stay tuned, I'll show you :)

Some ideas: alternative to the libertyretro asian lawn, more floral, yellow floral, ok, ok I have a slight obsession with floral lawns! 

Seersucker:
Seersucker is pretty amazing stuff.  It hides wrinkles (see Mom, I listen to you!) and it hides puckered seams!  It's also super lightweight and pretty much perfect for summer.

Some ideas: gingham seersucker, striped seersucker, I can't find any more online, but sometimes Joanns has some pretty cool seersucker.

Swiss Dot:
You have probably seen swiss dot before.  Swiss dot is essentially a cotton lawn with little embroidered dots all over it.  It's like cotton lawn with chicken pox.  One thing to keep in mind, make sure that if your fabric is see through, grab some lightweight cotton to underline the pieces with!

Here is an example of what it looks like.  I can't really find too much on the interwebs right this second.

Brocade:
Have somewhere fancy to go?  This dress would look great in a brocade.  Brocade really isn't too difficult to work with either.  I do have some pretty black brocade, however if I use it for this, you guys wont be able to see too much. 

Some ideas: this is super pretty, if I had a complexion other than "pasty white" I would buy this fabric in a heart beat :), love the dark colors on this one!

Sateen:
Sateen is on the heavier side of cotton.  I personally love sateen, I haven't sewn with it too much though.  I have a 3 yard piece in my stash and I don't know if I will ever use it.  It's just so pretty. Sateen is not very drapey at all, so the pleats on this dress would stand out a little more than if you use swiss dot or lawn.

Some ideas: Green/Purple floral print,

Well, anyways.  I hope that gives you guys some ideas. 

Things you should keep in mind when buying fabric:
1) If this is your first big project, stay away from anything slippery, silky, or shiny (other than sateen).   Sateen isn't super shiny, but don't go and get satin or silk/silk-type.  Trust me, do yourself a favor and stick with easy right now.

2) Ask yourself what you want the dress to look like.  If you want it light, go with a light weight fabric (swiss dot, lawn).  If you want it to have a little more body, go with a medium weight (sateen, brocade, some lawn). Pick up the bolt of fabric and unroll a couple feet.  Is the fabric stiff?  Is the fabric light and airy?

3) Ask yourself what collar you are going to use.  A light airy voile (similar to a lawn, but less crisp) will not react well if you try to make the structured stand collar, but it would look nice as a shawl collar.  A medium weight sateen would look good with both collars, but the shawl collar will be stiff.

4) Don't buy knit fabric.  Seriously, just don't do it.  Knits are easy to work with, but you would have to adjust this pattern.  

5) Remember the pleats in the dress.  A lighter weight fabric will kind of disguise the pleats, while a medium weight fabric will make them stand out a little more.  Does this make sense??

6) Check the opacity of your fabric BEFORE you leave the store.  That way you will know that you need a voile, batiste, or a lawn to underline with.

GSWDS: Bodice Darts and Skirt

I was going through my posts and realized this one never posted!  It just hung out as a draft!!  Sorry!!

Oh my goodness gracious!  The reason why I scheduled the sew along in February was because I usually don't have much going on in February.  This last month was so insane that up until yesterday I didn't even have time to check my email, now to top it all off I am sick.  I didn't get sewing or blogging or reading my blog done for almost this entire month.  So yeah, that's why it's been quiet on the blog and I haven't been responding to any blogs.  But, I am here now :) and I feel everything getting back to normal.

So, darts.  There isn't much to say about darts, honestly.  I do it the same old way as everyone else.  However, I wanted to post about this because I wanted to talk about how I mark my projects.
For this particular project I am using the Pilot Frixion Erasable Gel Pens.  I love these pens!  When I first started using them, I would actually make my husband and daughter watch as I ironed them.  So basically they are pens whose ink disappears when it gets hot, which makes them pretty perfect for sewing.  However, the one thing you need to do is test it on your fabric first.  On a little test square, just make a couple marks in a couple different colors and then iron them away.  You will see that some colors disappear better and some colors may actually discolor your fabric after you put the iron on it.  They are pretty awesome and they're definitely worth a try.


When I am using dark fabric, I use my allary chalk set.  There are two things to mention when using this chalk set.  1) sometimes the chalk doesn't want to come off your fabric 2) sometimes it doesn't want to stick to your fabric!!  So, once again you have to try it out on your fabric.


I used to use this, but I don't use it much any more.  It's not because I don't like it, because I do really like it.  However, I am running out of ink and I have yet to buy another one.  They aren't really expensive, but I just haven't gotten to the store and bought one-I just keep putting it off.  It is worth mentioning, though.  The purple end has ink that disappears after prolonged exposure to air and the blue end has ink that disappears after exposure to water.  I find that the blue end works really, really well for buttonholes.  

Then of course there is tailor's tacks.  Which I really like doing, however, they have a tendency to slip out.  There are directions in Gertie's book on how to make these.  I always use silk thread or handbasting thread for tailor's tacks.  I find that these threads are just easier on the fabric.  

So, mark your darts and sew them up!

I also figured pleats were pretty easy, I do have pictures if you want them, though!  

Now, you need sew the bodice fronts to the skirt fronts.  Since I was working with challis I used a french seam to attach them.

Introducing the Beginner's Series

Hey guys!  Yeah, I know!! I am so freakin' behind on posts its ridiculous.  Part of the problem is that my computer doesn't reliably get internet access, which I don't understand.  I talked to my (IT) husband, but I don't think he knows either and it's kind of difficult posting on an iPad or iPhone!!  I have been working on my shirtwaist dress but I will post about that later.

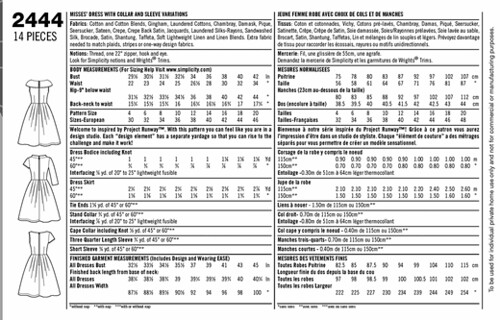
So, the other day I got an email from....well....to make a long story short, a friend, and she was asking me to help her make M6349.  I played good blogger and advised against it!!  :P  Anyways, after a couple novels emails later, we decided on Simplicity 2444.  I was going to send her a list of things she would need, then that turned to "maybe I should send pictures?", then that turned to "I should put it on my blog so I could help her and whomever else needs the help".  (Yes, I am one of those people who still use the word "whom") So, the Beginner Series was born (button to come!).

This series is going to be a little different then my Shirtwaist Dress sew a long.  I wanted to put up posts slowly.  Especially considering my Shirtwaist Dress sew a long STILL isn't finished :P  So, this first post is just a list of supplies that a beginner would need.  Also, post here or email me if you have any questions (even if this post is like 20 years old).

Are you ready?

1. Sewing Machine:
 There are some projects out there that could be done with hand sewing and I suppose this is one of them.  I mean technically anything can be done with hand sewing.  For the sake of this series, we are going to use a sewing machine.  Any machine will do, as long as it sews straight and zig zag.


 2. Needles:
You will need hand needles and machine needles.  While we will be using the machine, there are a couple spots on this dress that need some hand sewing.

For your machine needles, get a universal pack with a bunch of different sizes (it does not have to be Schmetz brand.  Get the right brand for your machine).  Make sure that you don't get "ball point" needles-those are for knit fabrics and we will not be dealing with those today.


3. Measuring tape:
Do NOT go by your RTW (ready to wear) size for this.  Just because you wear a size 8 dress, does NOT mean you wear size 8 pattern size!  I will go over measuring in a later post.

4. Pins/pin cushion:
Yeah, I have a boring tomato pin cushion.  I have plans to one day make a prettier one, but in the meantime, this does it's job.  Annnd, yes, my pins are organized by color and it looks like my tomato has some awful venereal disease, and this is not optional, I just like it like this.  Also, you want to get some pins that don't have a colored head.  They should be pretty easy to find.  These make marking your fabric infinitely easier (in my opinion.

5. Basting tape:
Try looking in the apparel sewing notions area.  If you can't find it, check out the quilting area.  I use this tape for applying zippers.  You can buy it on Amazon here.  The most important thing about this is that the package says you can sew through it.  Some tape you can't sew through and it will mess your needle up.  Don't buy that stuff...trust me...it's not fun.

6. Bobbins:
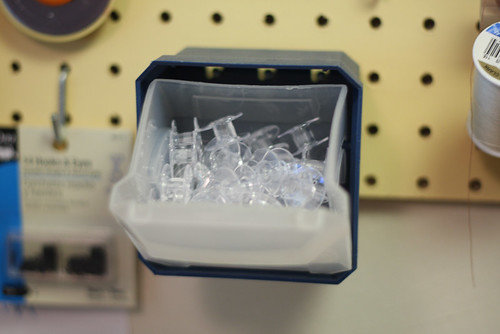
I went on Amazon and bought like 50 of these suckers.  I know some machines come with like 3 bobbins or something.  Which is great for this project, but you may want to look into purchasing a package or two.  Or bulk buy them on amazon and never run out of bobbins again :)

7. Seam Gauge:
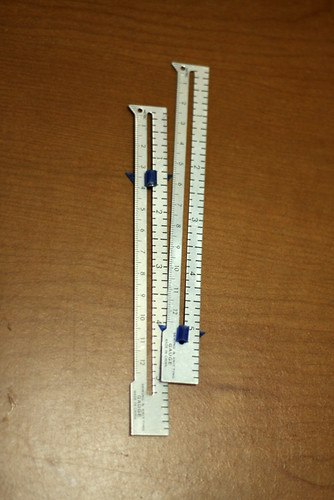
Yes, I have two of them.  You obviously don't need two right now, so just buy one.  However, later, you may want to pick an extra one up.

8. Seam Ripper:
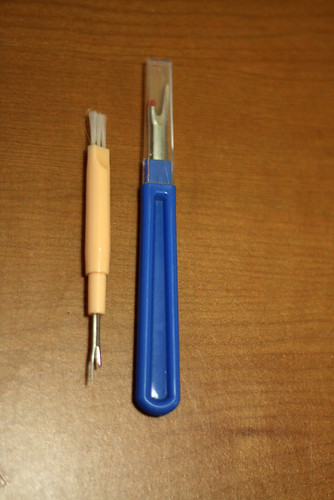
Meet your new best friend!  Let me just tell you that you WILL need to seam rip.  It's like that children's book, Everyone Seam Rips.  What?  No one has made that book yet?  Well, they should.

So, yeah, I have two of these.  I got the little one with my machine and if yours came with one, then awesome, you don't need to buy one.  I have two for two reasons: A) I have a tendency to lose things.  Seriously it's a family joke, my husband will give me something to hold and 30 seconds later it's lost.  B) the little one is great for ripping seams (go figure) and making buttonholes (I make mine with an exacto knife now, though) and the big one is great for taking out basting stitches.  Again, you don't need two, but you definitely need at least one!

9. Marking Utensils:
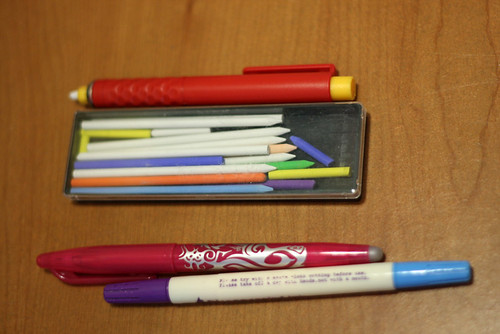
Okay, in the beginning you can buy these on a "per project" basis.  Marking pens is really a personal question.  I had to go through many, many duds that other sewers swore by before I cam up with my arsenal.  For dark fabrics I use this chalk system.  Its great for dark fabrics, but honestly, you have to keep them really sharp for them to be super accurate and sharpening wastes chalk.  For lightweight fabrics I use these heat sensitive pens.  These are awesome!!  However, on some fabrics, even after I iron over the marks, there is a light discoloration.  So, for those fabrics, I use a fabric marker (sorry, can't find it on amazon).  Basically, the purple side disappears after a while.  However, after you use the pen for a while, the ink starts disappearing faster and faster.  The blue side disappears after you get it wet.  However, sometimes it doesn't disappear.  Definitely get ALL of you blue marks off your fabric before you iron over it or wash/dry it!!  Heat sets it!

So, the most important rule when dealing with marking utensils is to test your fabric!!  Always test on a scrap piece before actually marking your garment!

9. Clear Ruler:
Honestly, you can pick this up in an office supply store, I am pretty sure.  You can get away with a normal wooden/plastic ruler, but eventually you will want to get a clear one.  I use these for tracing and for marking darts/pleats on fabric and this dress has both!  So some form of ruler is a must!

10.  Tracing paper:
Yep!  I am going to make you guys trace!  Why?  Because I am sadistic!  Ok honestly, tracing seems tedious and it's not.  I started out tracing using tracing wheels (see above...check out the vintage one!  Looks like a spur!  I got that one from Devin's Aunt :D She also wanted to know if I wanted a bunch of "old-I-almost-threw-them-away" patterns.  Ummmmm yes!!) and extra Christmas paper.  If you knew my mom, you would know that there has always been copious amounts of christmas paper and she keeps giving me new, unopened christmas paper from when I was a kid.  So, yeah, that was a cheap way for me to start out.  There is also tracing paper/pattern paper at Joanns.  You can usually find them by the interfacings.  Another option is what I am using now.  However, you may want to see if you like tracing before buying a full box.  It's pretty awesome.  It's light enough to see through, sturdy enough to draw/write on.

One this I would NOT recommend is tissue paper.  It's too weak and flimsy and it will fall apart when you try to write on it.

11. Scissors:
You need TWO pairs.  One normal pair (that you probably already have at home!) for cutting paper and thread.  You need another pair for just cutting fabric, and fabric ONLY!  When you cut paper, it dulls your blade very quickly, if you continually use scissors to cut thread, it can cause a little indent where you usually snip and that can affect your cutting.  I have a pair of ginghers (the pretty pair sitting by itself) and those can be expensive.  You don't need to buy that right now, just buy a pair of fiskers and take a sharpie and write "fabric" on the blades...then hide the scissors for dear life!  For some reason non-sewing people are very attracted to fabric scissors and try to use them for EVERYTHING (I'm looking at you Devin!).  If you have the money, then great!  Buy the ginghers.  Actually, out of everything on this list, a nice pair of scissors and a nice sewing machine are probably the best things to splurge on.

Oh, and by the way, I have a lot of scissors because we are a very creative family of three.  We actually do need all these scissors.  I need to throw out the red ones, though.  They are super dull and are super tight.


12. Pattern:
You need a sewing pattern, of course.  For this particular series, I am using Simplicity 2444.  Do yourself a favor and don't spend tons of money on patterns (unless they're indie patterns!!).  Go to sewingpatterns.com and as of right this second, Simplicity patterns are $5.99 plus shipping.  If you have a Joanns near you, check out their sales.  They routinely have pattern sales where Simplicity, Mccalls, and Butterick are only $1 a piece.  So, yeah.

13. Thread:
When you go to the store and buy your fabric, pick out thread to match it.  To be 100% honest with you guys, I am horrible at this.  Devin and Kayleigh are much better, so I usually bring them to the store when I do this.  :) Then, after a bunch of projects, you will have a thread collection like mine!  I used to buy coats and clark because my Singer liked that thread.  However, with my Janome, Gutterman thread works a lot better.    (On an unrelated note, everything about this picture just makes me happy :) )

14. Zipper:
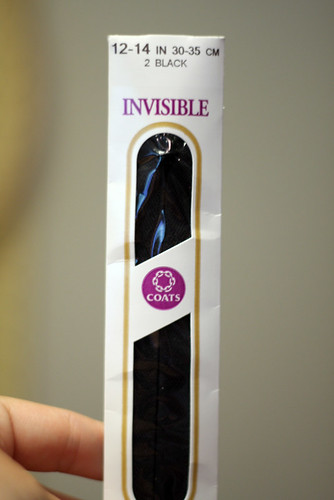
This is not the zipper I will be using for this project.  I wanted to take picture of the zipper package.  Get a 22" INVISIBLE zipper.  Why?  Well, I refuse to sew any other zipper.  Invisibles look better and are easier to put in.  If your machine has an invisible zipper foot, great.  If it doesn't then you can use your normal zipper foot to put this in.  I will show you how, because I do not have an invisible zipper foot and I am very slapdash with how I put in my zippers, so sorry guys!

15: Bias Tape:
ONLY get this if you are planning on doing the sleeveless version of this dress.  I am not going to do the facings for the armholes because I have always found those annoying.  Make sure you are getting single fold bias tape.

16: Seam Binding or Twill Tape:
If you can find it in packaging like this great.  This is a vintage notion I picked up at a sewing store for 50 cents.  If you can't find it, then you can buy "twill tape".  Honestly, it's practically the same thing.  The twill tape looks just like the bias tape package, but says twill tape.  Or, you can buy some online.  Sunni from A fashionable Stitch has a great store, which now that I look at it, she has the basting tape and the medical exam paper!  Definitely buy from her!  There are a lot more colors of seam binding in her shop and you would be supporting a fellow sewing blogger :)

If you can't find anything you like, buy extra bias tape (see above!)

17: Fabric:
Ahhh yes, probably the most important thing you need.  So, look on the back of the pattern and it has how much fabric you would need.  It gets really confusing because of all of the different pieces.  Don't let that scare you!  You should be safe with 3 1/2 yards of 60" wide fabric and 4 yards of 45" fabric.  I usually overbuy fabric and use extras for muslins.  If you want to do the tie ends, add 1.5 yards of fabric, because they are cut on the bias.

That's not all the fabric you need!  You will need about 1-1.5 yards of fabric for a muslin that we are going to make.  You can use old sheets that you don't use any more, you can use $1 a yard fabric from wal mart, you can use pretty much anything that you're not afraid of messing up.  I am not going to delve too far into fitting for a beginners sewing series, but you need to at least know if your pattern is going to fit!

18. Interfacing:
You will either need to look around for this section OR ask an associate where the interfacing is.  If you're in a craft/sewing store you can ask what weight of interfacing you need for the fabric you're buying and they can help you.  However, interfacing is just something that you need to learn.  First of all, don't buy knit interfacing, we aren't using knit fabric for this.  You should be okay with buying medium weight fusible interfacing.

You should buy 1/2 yard, but if you are going to make the stand collar get 1 yard.

19. Iron and Ironing Space:
Remember when I said Fabric is the most important thing?  Well, if fabric is the most important, an iron is the second most important!  You will be amazed at how much you don't actually sew when you are "sewing" most of the time is spent cutting out or.....wait for it....ironing!  This should be pretty self explanatory.

Oh and the reason why I said "Ironing Space" is because I don't think you necessarily need an ironing board.  As a matter of fact, when I first started sewing, I used a towel draped on the table next to me and just laid my pieces on that and ironed.  Then, my lovely Mother-in-Law (sounds sarcastic, but I can assure that she IS lovely and crazy awesome...just saying) got me an ironing board for my birthday!

Anyways, I will post a good resource for measuring (I guess you kinda need that, right? :P) and I will talk about fabric on the next post.  I don't think that one will be as long.  Besides, this was the dryest part of the whole thing!  I hope....


Oh!  And to all the advanced sewists out there who have made it this far!  Did I miss anything??  Leave a comment and let me know what you think is essential!


Thursday, May 2, 2013

Ahhhhhh!!!!

I am NOT dead in a ditch somewhere!!!  I have been sick 3-4 times since my last post, my allergies have been crazy bad this year, and I have an ovarian cyst (TMI?) that is completely benign, but is currently pumping tons of estrogen into my system and making me so fatigued that I feel like napping all day. Not much sewing was going on.  However, I am working on a big project for my munchkin's birthday party on the 12th!!  So, I am buckling down and I am going to get a ton of sewing done for it. I will take pictures and post.

Ooh, I also hear about google reader being shut down. What do you guys use to read your blogs??  I have an obnoxious amount of blogs in my reader and I need to start transferring them to another reader kind of thing.

Happy sewing!!!

Thursday, February 14, 2013

GSWDS: Interfacing, Stay Stitching, and Collar


Usually, I like to do stay stitching and interfacing immediately after I cut everything out.  I do this for a couple reasons: 1) I am deathly scared of curved edges stretching out before I can get to them, and I probably over-stay-stitch...if that's possible 2) I am a little lazy and I HATE interfacing.  There have been project with everything cut out and I will sew until I HAVE to put in the interfacing and then the project sits and languishes until I get up and just interface.  So, I found out if I lump cutting/interfacing/stay stitching together, projects get done much quicker.

Soooo,  Gertie didn't actually tell us to stay stitch any of the pieces, did she?  I am pretty anal about stay stitching, so I added it in.  The pieces I stay stitched were: Bodice Front, Bodice Facing, and both Back Yoke sections.  I don't have any pictures, but yeah, they're stay stitched.
 So, first thing first, sew the bodice facings to the skirt facing at the waist seam.  Now, you have a really long facing.

 Lay the facing right side up and then lay the interfacing piece sticky side up.  That is really important!  Facing=right side up, interfacing=sticky side up.  Then you want to sew (using a regular length stitch) the two pieces together along the outer edge.  See picture above.  Don't sew at the neckline, the shoulder seam, the bottom, or the other long side. 
Then, you want to trim the seam you just sewed and then if you have any extra interfacing at the bottom of your facing, snip that off as well.


 Then, very carefully, sew the outer edge.  The interfacing will fuse a little bit, but you are just looking for a nice, crisp seam at the outer edge.

 Now, you get to fuse the interfacing as normal.  The collar's interfacing is applied like usual.


Since we are already dealing with the facings and back yokes (you did stay stitch that right?) go ahead and sew the facings on. When you go to press the seam, make sure you press everything towards the back yoke.  You can also press the seam allowance back on the rest of the back yoke (this will help when you need to slipstitch everything together later).
Set your facings aside and you're done with all of your prep work!  Yay!  Also, don't mind the dress on the dress form.  I started making this dress last year.  It was supposed to be my mother's day dress, if that gives you any idea of how long it's been sitting there ;)  Must finish that dress...oh well!

GSWDS: Cutting

Ahhh!  I am so behind!  This week has been insane, honestly.  There was a bunch of things that came up that I really couldn't account for.  But, I am going to get some posts out today.  Better late than never, right??
One thing when you are cutting everything out, make sure that your front skirt piece will fit on the 60" layout before you start cutting things out!  Quite frankly, if your fabric is less than 55" wide, expect to use the 45" layout!  My fabric I am using here is 55" wide and the skirt just barely fits on there.
To see how much interfacing you need, you will have to measure out your facing and collar pieces.  I think I got a yard and half of interfacing, just to be sure I had enough.  Make sure you measure the front facings like in the picture.  Sure, you could get away with less interfacing if you put them right next to each other in the layout, but I didn't want to do that, because instead of cutting out four short pieces of interfacing for the front facing.  I chose to cut out two long pieces of interfacing, see below :P

 So, basically, you set the facings right up next to each other and cut two long pieces of interfacing.  I found that this got rid of some of the bulk at the waistline (I'm an apple shape and any unnecessary bulk at the waistline is a big no no. 


 So, now everything is all cut out and ready to go!  Go and get your self a drink or, if you have a cutting space like mine (the floor) go get a back rub from the resident back rub specialist *cough*husband*cough*

Wednesday, February 6, 2013

GSWDS: Tracing

When I first started sewing, I never traced.  Well, to be honest I hadn't heard of tracing until maybe a year into it.  I started tracing because of the Built by Wendy Dresses book, which has three patterns and a bunch of variations on each dress.  Anyways, I've been a faithful tracer ever since...especially kids patterns.

When I sit down and trace my patterns, I always use these:
1. Pattern Weights: Okay, so these aren't actual pattern weights, but whatever, use whatever works for you (and obviously we liked mexican food in this house, huh?)
2. Medical exam paper: I think everyone uses something different, but this is what I used.  I ordered this pack from Amazon in 2011 and I am still using it.  I'm about halfway through it.  I honestly love this stuff, it does have it's limitations, though.  To trace with this, you put the paper over you pattern and trace the lines, which means that it can get a little confusing, but you get used to it.
3. A large ruler: This will definitely come in handy when tracing the shirring placement line in this pattern.  It's not 100% necessary, though.
4. The pattern from Gertie's book: I put this on here for a reason.  Sometimes I get all my supplies together and then I'm sitting at the table, confused until I realize I forgot the pattern.  Ooops!
5. A clear small ruler: This is about 12 inches long.  This is definitely helpful when tracing and marking darts.  I got this in the drafting part of the craft store, but I know that the quilting has similar rulers.  I love it, but it's a pain in the butt when you lose it because it just blends in with the carpet/fabric/cutting surface.
6. Seam Gauge: I use this all the freakin time.  I use it to take in the shoulders, take out the waist, etc etc.
7. Tape: When doing alterations on your pattern, tape is super important for slashing and spreading or taking a chunk out of the pattern.
8. Pencils with good erasers: Do yourself a favor and don't trace with pens...rookie mistake that I may or may not have made.
9. Paper Scissors: self explanatory :P
I use those with every single pattern I trace.  Here are some optional things:
1. Wrapping Paper: I used this before I got the exam table paper.  I actually completely raided our christmas paper stash and we are finally feeling it.  But, this stuff works surprisingly well, honestly.  You can't see through the paper, but if you're going to go this route, then you'll need...
2. Tracing Wheels: The crazy death trap one is actually pretty sharp and I got it from my husband's aunt (my aunt-in-law??) and it's awesome.  I use this a lot, but not so much with tracing.  
3. Fine Tip Sharpie marker: I use this in two instances: a) when I am feeling extra awesome and I want to go the extra mile or b) I am procrastinating and want to find any reason whatsoever to put off cutting out fabric.  So, sometimes I go back over my trace lines with the sharpie maker, let's face it, I don't do it all that often :P but hey, you can if you want to.
So, when you're tracing out the pattern, you will only want to trace out:
Bodice Front
Dress Back
Skirt Front (only if you're concerned about length)
You will trace the rest out after we do the muslin.
The rest is pretty simple.  Unfold your pattern and trace off these pieces, using either the exam paper or the tracing wheel.

A couple things about Gertie's patterns:  

1. You can't skip the tracing part.  Her patterns overlap and are printed on the front and back of the paper.

2. Make sure you get all of the markings.  The first time I made this dress I didn't catch these little guys:

These are how she marks notches.

3. Make sure you're getting the right size.  It is a little difficult finding exactly which line to trace sometimes.  Especially if you have the exam paper over the pattern.  What I did was mark the sizes on the actual pattern like so:
Anyways, so I guess this is my post about tracing.  I wish I had ground breaking information for everyone out there, but I don't.  There really isn't a trick to tracing, and at first it seems like it's time consuming, but I have NEVER regretted tracing something.  
So, I will see you guys tomorrow with some muslin shots (yes, I kept my muslin hanging around for this very purpose...of course I could have just taken a picture of it and then thrown it away.  Hmmmm, oh well.) 

Tuesday, February 5, 2013

Gertie's Shirtwaist Dress Sew Along!


Yay! Gertie's Shirtwaist Dress Sew Along has officially started...yesterday...oops. Sorry, guys. I was meaning to sit down and write this post yesterday, but I randomly took a nap and then it just didn't get done.

ANYWAYS!

 I wanted to do the introductory post and put up the schedule of posts that I wanted to do. Obviously, you can work faster and/or slower than me. I just wanted to do a series of detailed posts of what I do when I make this dress. The posts would be directed to the "advanced-beginners". Why? Because I think that everyone should make and wear this dress all the time. :P I also wanted these posts as a great place for beginner sewists to look at when they make this dress. Also, since this will be my third time sewing it, I have picked up a couple tricks.

So, here is the schedule:
February 6: Tracing
February 7: Muslin
February 9: Cutting out, interfacing, staystitching, collar
February 11: Bodice Darts and skirt 
February 12: Shirring
February 13: Pockets and side seams
February 14: Side Seams
February 15: Sleeves
February 16: Collar/Facing
February 17: Buttonholes/hem, handstitching/buttons
February 18: Final dress!!

So, if you guys follow along, awesome and I would love to see your finished projects! I set up a flickr account to make it easy to share, but also email me (kitschymommy@gmail.com) pictures! I would love to post like a round-up.

I'm super excited!

Thursday, January 17, 2013

We made the buttons on the screen look so good you'll want to lick them

I can't take credit for the title, that is actually from Steve Jobs.  I really can't imagine him saying it, but I thought it was funny. :P

So, why am I talking about buttons??  Well, it's because my darling husband sat down tonight and helped me make my first ever button for the blog!  and by "helped me" I mean he did it and I sat there and said, "I want pink on it"  "We need more colors"  :P  I did do a little bit in photoshop, though.

Anyways!! I have the buttons for the sewalong.  Go ahead and copy and paste 'em to your blog or you can print it out and hang it on your fridge :P whatever works for you.


Gertie's Shirtwaist Dress Sew-Along

Also, I officially started a flickr group so that all of the images are in one spot.  Anyways, I just want a casual sew along, no strict deadlines or anything.  But, if you follow the posts while I post them or follow them a year after the fact, I would love to see anything you made (hence the flickr group).

I am pretty excited, can you tell?  Not going to lie, I think I may be more excited to make another shirtwaist dress...I may have a problem :P

Wednesday, January 16, 2013

I got an award!

Sometimes I am pleasantly surprised that people read my blog.  I started this blog *almost* a year ago and I wasn't even sure if I would get one follower.  I am now up to 15 followers!  While this isn't a gigantic number, it's 15 more than I originally thought!

One of my favorite blogs, One Crafty Minx, nominated me for the Liebster award, which is an award for blogs with less than 200 followers.  I am so honored that she gave the award and I have been telling my husband and daughter that I got an award :P

So, first things first, I have to tell you 11 facts about myself.
  1. I am painfully shy in real life.
  2. However, once I get to know you, you wont be able to shut me up!  My poor mother-in-law found this out one night a couple years ago!
  3. I ramble.  This is my third time writing this post!  The first one turned into a crazy essay and I've been trying to get the word count down ;)
  4. I have an irrational rational fear of birds, well actually most flying things.  I have been known to scream and to let my then three year old sit 30 yards away from me because she was eating a donut and the birds were flocking to her.  I kept my eye on her, but I stayed far away.
  5. I have an addiction to crime shows!  Law and order, dateline, deadly women (I'm watching that now!!), pretty much every show on ID.
  6. I don't have television.  My husband and I had it at one point, but we decided it was just a time suck...so now we use youtube as our time suck!
  7. I am wiccan.  I don't know if this will offend anyone, but yeah, I'm wiccan. 
  8. I am a recovering anorexic.  I don't know if this should be on here, but it is a fact about me and I am unapologetic about it.  In high school I got down to 86 pounds (I've been 5'3" since 5th grade) and I was anorexic for 6 years before I started recovering from it.  When I started gaining weight, everyone at school thought I was pregnant.  I occasionally have relapses and I just recently got out from a 3-4 week relapse.  It's something I will just have to live with.
  9. My favorite color is rainbow.  :D  I love bright colors!  However, I guess it's getting apparent that I really like blue and purple.  I think I only made blue and purple things for the blog this last year!
  10. I'm a photographer.  There aren't many examples of my work on this blog,  I don't know why.  I deal mainly with self portraits in my fine art.  I should put more of my work on here....
  11. One of my favorite movies is Crybaby!  It was a horrible movie, but I love it!  I think it's a musical that makes fun of musicals.  I just love it!  However, every time I watch it, I realize that I would probably be a square and not a drape :(  I actually named my first sewing machine Pepper because of a quote from crybaby "Now, Pepper's pregnant, but she can fight like a man".  Turns out my sewing machine was crap and now I have a Janome that I named Peppermint Patty.
Okay, so now I answer the questions posed by A Crafty Minx:

  1. What has made you smile today?  My daughter made me a play-doh marshmallow with pink dots all over it.  She said, "It's a marshmallow with chicken pox!  Do you want to eat it??"  Ummmm, no, not now.
  2. What song makes you turn the radio off?  I have a pandora account, so I don't really have too many songs that I turn off, however, if Chris Brown comes on I click thumbs down.  I like his music, but I have a thing about men who beat up women...I just can't let it go (and I don't even care about the lives of famous people!!)
  3. What is your irrational fear?  I don't think I have any.  My husband thinks my fear of birds is pretty irrational though.  I don't think so.  I mean, have you seen the beady eyes, sharp beak, and claws??
  4. What destination is top on your holiday list?  I would LOVE to take my husband and daughter to New York.  I went in high school and I got to watch Wicked (before Wicked was so crazy).  I got to see Kristen Chenoweth on stage, in person, before she was so well known!  And not to mention, I got to meet and CONVERSE with Richard Dreyfus!  Yes, for a split second, Richard fucking Dreyfus knew I existed.  Sorry, I was raised on Jaws.
  5. If you could do anything as a career, what would it be?  Easy, I would be a PAID photographer :P
  6. What is your favorite item in your house?  I have a BEAUTIFUL sideboard that I bought at Salvation Army for 70% off!  It had just been marked down and then the 70% off made it $7!  It was my first piece of furniture that I have ever purchased.
  7. What is my exercise of choice?  I love riding my bike (I named her Doris, after Doris Day).  
  8. What are you most likely to be doing when you're not blogging?  People, I have a husband and a four year old.  If I'm not blogging or sewing, I am cleaning!  Ugh.
  9. What is the last film you saw in the Cinema?  Ummmm, Wreck it Ralph.  Without the munchkin, the last film I saw was Looper.  Have I redeemed myself??
  10. What is your favorite weather?  Rain!  I just love watching it rain, I love going for puddle walks and I love to shot (camera) in the rain.
  11. Do you have a specialty in the kitchen?  I am known for my baking and for cooking vegetarian/vegan.  My parents get nervous when I cook at their house.  I don't cook vegetarian for them...last time I was down, I roasted a freakin' pork loin.  My brother-in-law asks me if I give him "real food".
Now I get to ask my nominees questions.
  1. What is your favorite movie?
  2. What is your favorite fabric to work with?
  3. What is your least favorite fabric to work with?
  4. What is your happiest childhood moment?
  5. Who was your first love?
  6. If you won a million dollars, what would you do with it?
  7. What is your favorite board game (or video game)?
  8. What is your favorite thing you have ever made (clothing or not)?
  9. How do you keep organized?
  10. What is your favorite time of day?
  11. What is your favorite book? (would expect any other question from the Bookworm Sewist??)
Ok, my nominees are:
  1. Nothy Lane from Aft Agley is one of my favorite bloggers!  Not to mention I won the pattern pyramid from her :P
  2. Pretty Grievances-everytime I read her blog, all I think of is Molly Ringwald and leopard print!  Right now she's doing an awesome feature "Jungle January".
  3. Purls and Pleats-everything she makes just looks so nice and always pushes me to up my constuction standards.
  4. Crafting a Rainbow-You may know her from all of the sewing dares she's passing around!  
  5. Falling through your clothes-I love her writing style!  Everything is always such fun to read.
  6. Young, Broke, and Fabulous-need I say more?   I love her style and envy the swing dancing she does!
  7. Making it Well- I found this blog through the SewColette sew along.  I pretty much love everything she makes (especially her knitting!)
  8. Not your average average-she's growing out her pixie right now, but man seeing her dresses with her pixie, makes me really want to get a pixie cut :P
  9. School of Moxie- I am not sure if she has under 200 followers, but I love her (new-to-me) blog!  Plus, she wiccan and reads tarot cards...how could I not??
  10. I heart fabric- I love all of her makes, but I especially love her versions of the Colette Macaroon pattern!
Man, that was interesting exercise.  I was really surprised how many of my favorite blogs have under 200 followers.

Thank you Crafty Minx for nominating me!  I'm sorry it took forever to put up here, but I have been working on it for a while (I promise!!)

Tuesday, January 15, 2013

Gertie's Shirtwaist Dress and an Announcement!


Soooo, I made another shirtwaist dress from Gertie's book!  Have I mentioned how much I love this dress??  I could seriously live in these!  This dress is impeccably drafted and is so freakin comfortable and at the same time adorable, I think everyone needs one!


I made this dress in a different cotton lawn.  This lawn, I had been eyeing from Denver fabrics for a looooong time, but I never bought it.  A couple months ago, I decided that I was just going to buy it and get it over with.  Shortly after I got my copy of Gertie's book and it was a match made in heaven :P  I must say that I am a *little* disappointed in this fabric.  It is slightly see through and isn't as soft as my green dress.  I bought both pieces of fabric from Denver fabrics (FYI).
Here is the shot of the back with the shirring.  Have I mentioned that I love this dress yet??  I wore it out to dinner last night and it was super comfortable.  The one thing I changed about this dress is the shoulders.  I took 1/2" out of the top of the shoulder.  I think this dress is slightly more flattering than the green one, however I love both. 

Ohhh the glorious shirring!  Have I mentioned that I love this dress? :P  Okay, enough of that.  My shirring lines look a little wonky here, but they are actually super straight-it's just how the dress is on the hanger.  This shirring is amazing and I loveses it.  I want to add shirring to every dress I own.  

Okay, as much as I love the shirring, I HAD to show you my buttons.  I had some teal buttons that I was going to use for the dress originally, but they were a little too contrasting.  So, I wanted to make fabric covered buttons and then I remembered a vintage dress I saw at a local vintage dress shop.  There were two layers of fabric on the buttons, one of white satin and another of white lace (it was a wedding dress).  I fell in love with the idea and vowed to use it as soon as possible!  Flash forward a year (isn't that how it always happens), I was putting all of my new fabric from L.A. away and realized that I had a ton of teal lace and it would be a perfect time to use this technique.  I'm not going to lie, it was MUCH harder to do two layers of fabric on the buttons than just one, but I think it was worth it.  IT adds a little texture and a little color, but from far away, it just looks like teal buttons. I would definitely use this technique again.

So, for the big announcement??  I am officially announcing the sew along for this dress!  I am so excited!    My wonderful hubby is going to make us a button and everything (more to come on that), and I have the whole thing kind of planned out.  I even saved my first muslin to show you guys (aren't I nice?).  The sew along officially starts on February 4th!  I figured that would be enough time for people to gather supplies, but I will be posting fabric recommendations and a supply list before then.

So, are you going to be joining me in making yet another shirtwaist dress??


Friday, January 11, 2013

Fabric Porn!!

As a warning, there are 23 pictures in this blog post! I wanted to thank all the well wishes and birthday wishes on my last post! I had a pretty good birthday, by the time my bday rolled around, 80% of my symptoms were gone, I still felt like shit, though. I felt like I was dying and I may or may not have given my last requests/words to my husband. I even apologized to my mom for being a "little asshole" when I was a teen. Oh yeah, I didn't mention that, I had food poisoning/stomach flu at my parents house. So, a four days before the horribleness set in, my husband and I drove to my parent's house (my daughter was already there), and then my mom, husband, daughter, and I drove to LA to celebrate my birthday. On a side note, I told my daughter that we were going to Downtown Disney and if she wanted a princess dress, she would have to save up her own money. She ended up saving $130!! That is a crazy amount for a four year old!! I'm so proud! She bought two and my mom bought her another two. *le sigh* $250 worth of princess tulle. ANYWAYS! I wanted to go to the Loft for my birthday and I brought $200 to spend in the garment district and just like last time, I couldn't spend all of it! So, I wanted to post my spoils here. Look away now for fear of fabric envy! So, I'll show the "expensive fabric".  These two I got at Michael Levine.
This is a really nice, lightweight shirting for my sweetie.  I wanted to make him a colette Negroni as a thank you for driving to LA.  Now I want to make him a Negroni to say, "thank you for putting up with me when I am sick and whiney.  I got 2.5 yards at $6 a yard
I immediately thought Hazel for this one...but I already have a plaid hazel...we'll see.  This was 3 yards at $5 a yard.
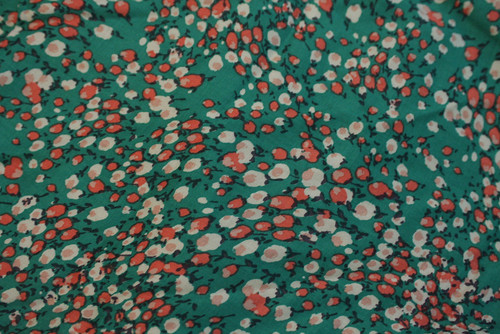
We also went to a smaller fabric shop and I picked these two for $3.99 a yard.

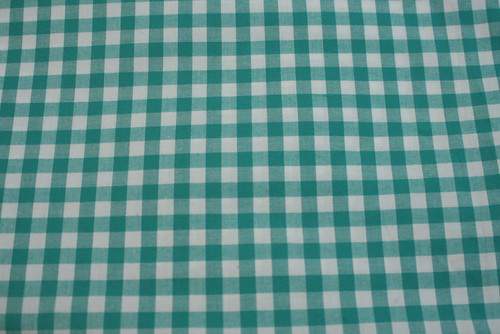
I just fell in love with the emerald-y green in this gingham!  I'm thinking maybe something from Gertie's book for this summer. 4 yards

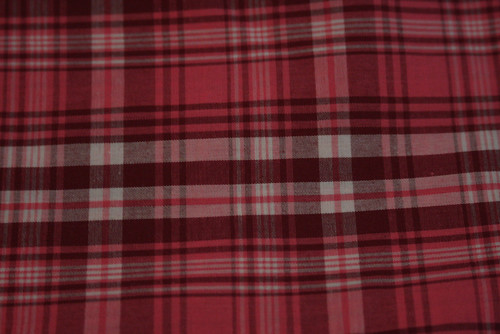
Obviously I love plaids, but this is the last one!!  I got 3 yards of this one.
Ok!  Now for the stuff from the loft.  I ended up getting everything for about $1 a yard :D

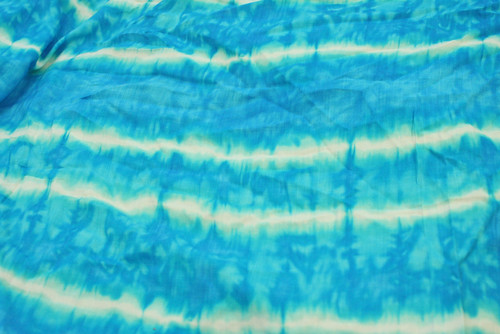
cotton/rayon blend 60" 4 yards

cotton/rayon knit 60" 3 yards

cotton/rayon blend (feels like a voile, maybe a maxi skirt/dress?) 55" 3 yards
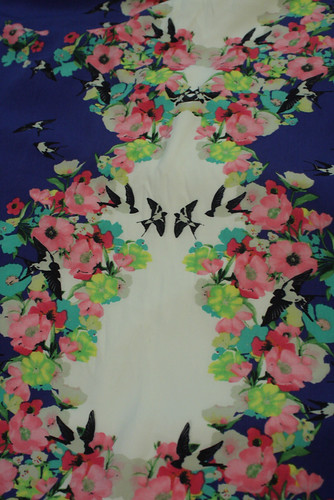
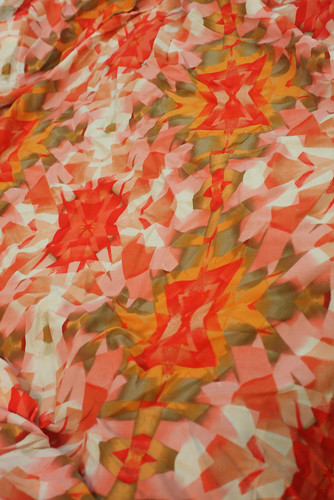
polyester-but this is a nice poly and the fabric is so pretty!  There are two wide columns of this print running vertically through the fabric. 60" 4.25 yards
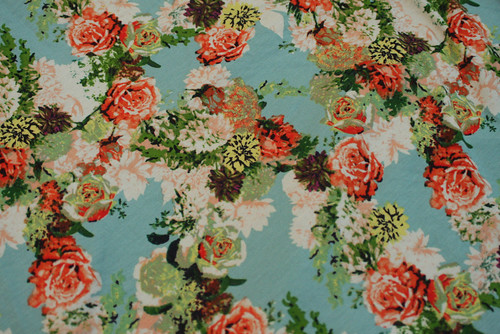
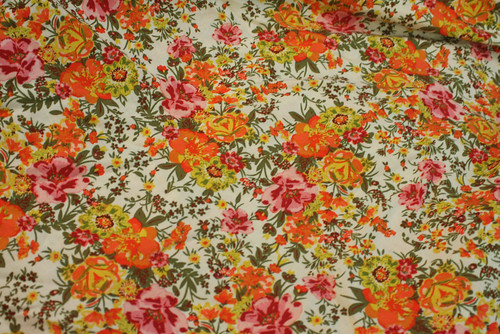
I LOVE this abstract floral print!!  It's acrylic and not the best quality, but I think it should be okay if I make it into a sleeveless blouse... acrylic 54" 2.33 yards
Nylon 60" 1 yard
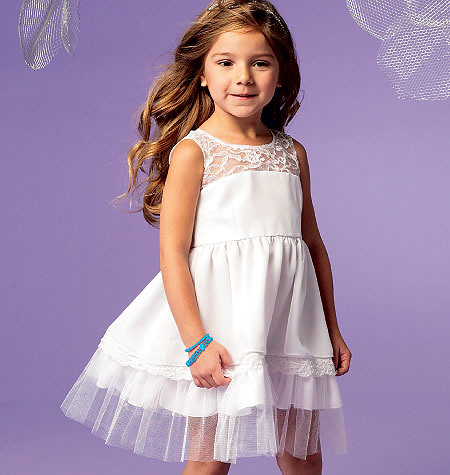
I actually got this for a reason.  My daughter starts kindergarten in the fall and she has already chosen her first day of school dress she wants me to make her:
Man, my kid has sophisticated taste for a four year old.  I wont make it all white, and I'm going to change the skirt part and make it more kid-like.

Rayon 55" 3.5 yards 

Rayon 60" 5 yards
Can't you see this made up with Chantilly??

acrylic 60" 3.3 yards

53" 1.5 yards
My daughter actually picked this out for herself.  If there was more yardage I would steal it for myself.  Wait....do I have the same tastes as a four year old??  Hmmmmm, I did get a lot of floral....

66" 3 yards
Ok, I don't know what this is.  It is a stretchy, heavy, very stable knit.  The burn test says that it's an "olefin" which is used for athletic clothes.  Hmmmmm....but I loved the print.  Maybe a knit pencil skirt and CRAZY yoga pants :P

Polyester 50" 2yards
This is another good quality poly.

ITY knit 60" 4.25 yards
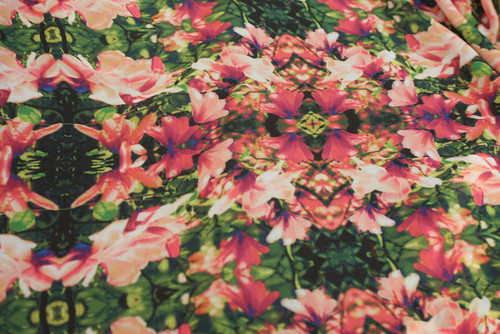
Ok, it's hard to see in this picture, but the flowers on this are ginormous!!  Seriously, they are about the size of my face...actually most of them are bigger.  Maxi dress??
Nylon 55" 3 yards
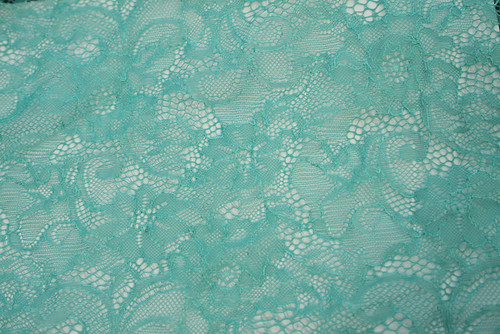
Mmmmm, this lace is soft and silky, I can't wait to use it.  I *may* make it into a wrap dress.  We'll see.
Poly sweater knit 54" 3/4 yard
This isn't actually mine!  My husband found it and decided to make it into a sweater for our daughter.  That will probably have to wait until next fall, though.

cotton/rayon blend (feels like a lawn) 54" 4 2/3 yard
*squee* I am a sucker for novelty prints, but I don't like wearing quilting cottons.  So, they're hard to find for me.  I actually squeed aloud when I saw this (That just doesn't sound right).  I don't know if you guys know this, but when I was in middle school/high school I had a horse named Brown Sugar (I didn't even name her that...the Rolling Stones follow me everywhere).  Anyways, I see a summer dress made out of this and I am going to wear it to some fairs this summer :)

Close up of the awesome horsies:
The horsies are my second favorite, but this is my favorite fabric I got!

Stretch cotton sateen 54" 2.3 yards
On our way to L.A. my sweetie asked me what I was hoping to find.  I said I was hoping to find a "vintagey hawaiian print" at Islands Fabrics.  We ended up not getting to Islands, but I found this at the Loft.  This was the EXACT fabric I was looking for!! Well, except for the stretch, but that's fine.

Anyways!  This was what I did to celebrate my birthday.  I also got a crazy awesome owl mug from Pier One!  I should post what my Sweetie got me for Christmas...it's awesome :D  But, I will save that for another day.